Maintenance help page
- Set the password for the database.
- Make Satellite Databases.
- Sync with Satellite or master Database.
- Set the Clipboard option.
- Set the options for the auto generated passwords.
- Select which form is displayed on start up.
- Turn on or off the Welcome Splash screen.
- Turn on or off saving the last position and size of the Account Tracker Windows.
Some of the Maintenance Form functions.
This is the initial default view of the Maintenance form. This is an interactive image. Place your mouse over a button or label and if a descriptive name pops up then you can click on that area for more detail.
This is where you can perform Account Tracker special functions and Database Maintenance. You can also set application options on this form.
 click on image for large picture")
Unique Database ID
This is the Identification number assigned to your Account Tracker Database upon initial opening. This ID is used in the Syncing process.
App Version
This is the version of Account Tracker you have installed. The version is displayed in several locations; on the
Expanded Details View form,
the Short View Account List form and in the Title bars of most Account Tracker windows.
Code Version
The Version Code marker identifies which version of Microsoft's Office Access was used in compiling the code. The code can run on
either Office 2007 or 2010; it is self adjusting and will accommodate either version. The code compiled under Office 2007 can run on both office versions.
The code compiled under Office 2010 can only run under office 2010.
Image Vault Control Button
The Vault Open/Close button initiates the process to open or close the Secure Images Storage Location Vault.
In opening the Vault the Maintenance form is expanded and the Secure Image Vault directory and several option check boxes are displayed.

There are three controls in the vault that you can use. The Browse button, the Copy Check box and the Remove check box. You can use the
Browse button to open a folder browse dialog box and select a new location for your Security images. Before you change the location you need to decide
If you want to copy/move the images to the new location. If you have assigned Security images to any of your Account Tracker entries changing the location
of the Vault will break the links to the images files. If you leave the both the check boxes checked the images will be copied to the new
location and removed from the old(moved). If you uncheck the Remove check box then the images will just be copied to the new location(Copy).
If you uncheck the Copy check box then the Remove check box will be disabled and the images will not be copied or removed.
There are implications with moving the Security Image location. Please check the Secure Images Storage Location Vault help
page for more details.
The Close Button
The Close button will close the Maintenance form and take you back to the form from which you opened the Maintenance form.
The Help Button
This help button will bring up this help page (on the Maintenance form) in your favorite browser.
Make Satellite Database Button
The Make Satellite Database button initiates the process of making a remote copy of the Account Tracker Database.
One of Account Trackers special features is the ability to make a copy of itself for you to take with you on your laptop. The main
database (DB), the one you installed first is the Master Database. The master DB can sync with any number of self copies (Satellite DB's).
The Satellite DB's can only sync with their master. Please view the Make Sat DB help page
for more in depth discussion on this feature.
Sync Databases Button
The Sync button only become available when you have created at least one Satellite DB. The sync process will update either
the Satellite Database from the Master or the Master from the Satellite or both from each other. Please visit the
Sync Satellite help page for more detail.
Sync Area
The Sync area is the control panel for managing Master to Satellite and Satellite to Master synchronization.
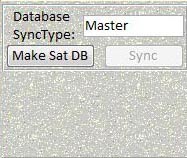
In the upper section of this area you can find the Make Satellite Database Button, the
Sync Databases Button, and the
Database Type box. In the lower section you manage the
Sync Method Selection.
Database Type
There is only one Master DB in an Account Tracker constellation. The first install of Account Tracker is the master Database(DB).
All subsequent copies are Satellite DBs. In a Satellite DB this field will show 'Satellite'. You can change a Database from Master to Satellite
and Satellite to Master, but once this is done the Database can no longer sync with the previous members of its constellation (Master & Satellite).
Sync Method Selection
In this area the sync method selection takes place. Once the user has pressed the 'Sync' button and initiated the syncing process
this area displays four

Sync method selections.
The Go Button
Once the user makes another choice (which sync method) another 'Go' button appears. 
Press the 'Go' Button and the Sync process takes off.
Return
Set Password Button
Press the Set Password button to set the password that protects entering Account Tracker. The Set Password area below will display password entry boxes.
View the set password help page for more details.
Timeout Value
Account Tracker will lock its display window if it has been left idle. You can set the length of time it will wait before locking up. The
acceptable value range is 0 - 999 minutes. Setting the value to 0 will turn off the idle time lockout; values from 1 - 999 are the number of minutes
it will wait.
When Account Tracker is locked the screen will look similar to this
Idle Lockout Login Screen
Once the Idle time has been reached Account Tracker will lock its input screen and not allow any access to the data until the Account Tracker
password has been entered again. Idle Lockout/Login

Just type in the password used to initiate Account Tracker and the session will resume at the previous position.
*Note: These Single focus text entry boxes are common in Account Tracker. When they come up most other window controls are disabled.
To exit this single focus state press the 'ESC', Escape, key and he process will be aborted. Setting the Password
When the Set Password button is pressed,
this area is used to set Account Tracker's access password.
Initially one password entry box is displayed.*

and instructions below ask for the current password before you are allowed to enter a new password.
For a more in depth description view set password help page.
Auto-Generated Password Options
The Auto Generated Password Options Area allows the user to set application defaults
for the password automatically generated for each account.

During the Add New Entry
process, on the add password window there is a button labeled
"Auto generate".
The options in this area effect the characteristics of the generated password.
The Password Auto Generation button.
This is the window used to add or edit a password for an entry. If you don't want to think up a password
click or press the "Auto generate" button. A password, of the length specified in the box beside the button, will be generated according to
the Auto Gen Options.
You can override this length value for this generation, by typing the length you desire. Once the "Auto generate" Button has been
pressed you can accept the password; change any part of the password or type in your own password and press Enter to complete the process.

Return
The Password Options Tab.

On this tab the user can
set the Account Tracker password and the Options
for automatic password generation.
The Display Options Tab.

On this tab the user can select the startup form either the Extended Detailed view
or the Short Account Names view.
The user can turn on/off the displaying of the
Welcome Splash screen Also the User can set whether Account Tracker will save and redisplay its windows/forms at the same size and
position at which they were last closed. The reset button allows the user to remove all save windows sizes and positions.
The Welcome splash screen.

Return
The General Options Tab.

For more details please visit the Clip Operations help page.
When you click on the Upgrade Check button Account Tracker will go visit it's home website and check for the latest version.
If that version is higher than your current version You will see...Upgrade Check Button
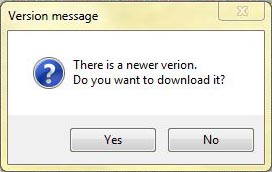
Click 'Yes' to download newer version.
When you click "yes' Account Tracker will attempt to download the newer version.New Version Found
During the download, depending on the speed of you internet connection you may see this wait message.

When the download is complete another message is displayed
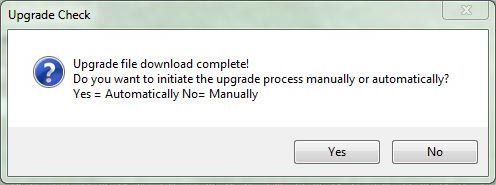
You now have the choice to initiate the upgrade manually or automatically. Press the 'YES' above to continue with the automatic
path. Press 'NO' above to continue with the manual process.
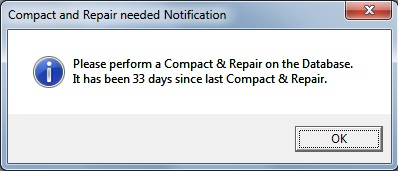
If sufficient time has passed and you have set the Notification interval, you may see one or both of
these notifications displayed at startup and when you open the Maintenance form.Password and Compact & Repair Notifications
 and
and 
These are important. The upgrader file MUST be in the same directory as your
current Account Tracker file and you MUST use the short cut created to start the upgrade process
and you MUST remember its password to run it. Download Complete: Manual Upgrade initiation
 The download has been to the same directory as your current Account Tracker file and a short cut to run the upgrade file
has been created there too. Your are also given the password to the upgrade file.
The download has been to the same directory as your current Account Tracker file and a short cut to run the upgrade file
has been created there too. Your are also given the password to the upgrade file.
To run the upgrade Exit Account Tracker and double click on the "Run 1.8.6.4 Upgrade" (or what ever version is the latest) short cut.
Just to make sure you remember, the password is displayed again...Download Complete: Automatic Upgrade initiation
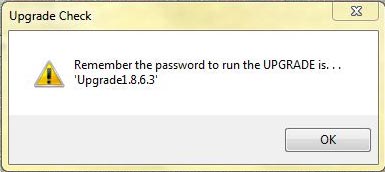
When you press OK Account Tracker will exit and the Upgrade process will begin. Just follow the on screen instructions.
Registered Name area.
Currently this image shows that this copy of Account Tacker is registered to Sally Story. However,
in the Trial version this area displays a "Trial" button as seen below
Click on the Trial button to display the
 License Key Input window. Account Tracker Trial can be run 30 times before a license is required.
This window will be displayed by pressing the "Trial" button on the Maintenance form
and on start up a few openings before the free trail period comes to an end.
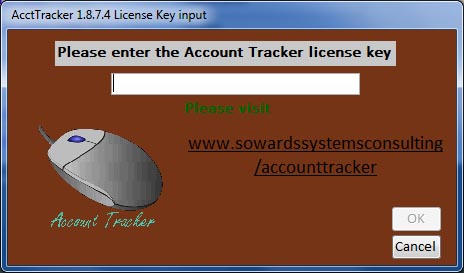
From this window the user can link to the Account Tracker home site and purchase a license key
and input that License key to register their copy of Account Tracker.
The Compact & Repair Button
Pressing the "Compact & Repair" button will cause Account Tracker to compress out wasted space and repair
any corrupted indexes. This button is especially helpful after performing a
DB Check and then a
Clean of the database.
The Database Check Button
Pressing "DB Check" is the beginning of the cleaning process. Cleaning the database is rarely needed, but easy to
do. It can be helpful after using Account Tracker for a long time and you have deleted multiple records or made many record updates.
Just press the "DB Check" button and Account Tracker will use the large notification area to display a wasted space listing of
unused/deleted entries. If there are no records to clean up a Clean
Message. If however there are records to clean up the Clean
button becomes enabled.
Please visit the cleaning up help page for more detail.
The Clean Button
The Clean button is only enabled after pressing the
DB Check button and when there is wasted space or deleted records that can be removed from the database. Along with the Clean
button there is an "Auto" toggle button. Initially the toggle button is off meaning that the clean process is in the manual mode.
If clicked this button turns ON the auto process. 
Please visit the cleaning up help page for more detail.
The Clean Message area

The Clean Message area
This large area is primarily used to display notifications and progress of the Database clean process.

But it also serves as an instructional notification area too.
Asking for passwords
The Message area
Current password instructions
 New password instructions
 Confirm new password instructions
and other instructions for the making Satellite Database process as well.