Maintenance - Database Cleanup help page

In this instance the when the DB Check button was pressed there was only one area that needed to be cleaned -
The remembered search history.
Since there is only one area to clean, we can select it and press the Clean button. This will get rid of all the remembered searches that have
been done. Click on the clean button below to see the result.
DB Status

Orphans cleaned up
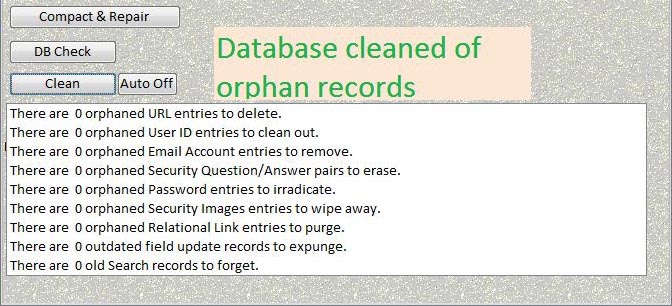
Since all the nine clean up area have 0 records to clean out the DB Clean notification is displayed.
In this instance there are several areas that need to be cleaned. This is when the Auto on/off button comes in handy. By turning this
button on and then pressing the Clean button, all nine areas are cleaned. Click on it once to turn it on (the label
will read "Auto On"). Click on it again to set it to "Auto off" DB Status
Press the Clean button below.

Orphans cleaned up
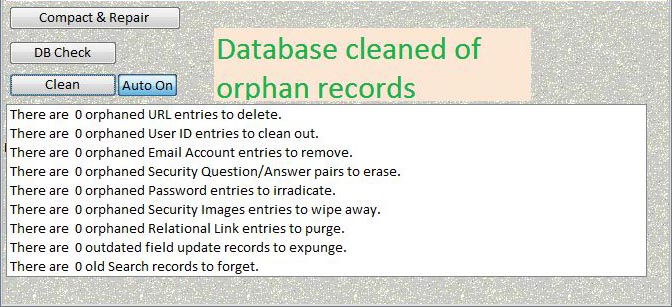
Once again the DB Clean message is displayed because all the areas report 0 entries to be cleaned out
This button is a two stage toggle button. You can set it on or off. It defaults to off.
The Auto On/Off button
This button is a two stage toggle button. You can set it on or off. It defaults to off.
The Auto On/Off button
This large area displays the individual status of the nine areas (tables) in Account Tracker that need to be
cleaned periodically. Each line can be selected so that area can be cleaned individually. If the Auto On/Off button is
set to "Auto On" then when the Clean button is press all nine areas will be cleaned.
The Status notification area